Master Safe Babywearing Positions for Happy, Secure Carrying
By Avery Sullivan • 22nd Oct
Did you know that over 90 percent of babywearing-related injuries stem from preventable errors in setup or positioning? Every parent wants the safest and most comfortable experience for their baby, but one overlooked detail can make all the difference. Following trusted steps for carrier preparation and proper baby placement means fewer risks and more peaceful moments together. With the right checks, you create both security and confidence when carrying your little one.
Quick Summary
| Key Point | Explanation |
|---|---|
| 1. Inspect your baby carrier thoroughly | Check every strap, buckle, and seam for wear to ensure safety before use. |
| 2. Position baby in an ergonomic 'M' shape | Ensure your baby’s legs are spread wide with knees above their bottom for healthy hip development. |
| 3. Align hips and neck carefully | Maintain a 40-55 degree angle for hips and a gentle 'J' spine curve for natural support. |
| 4. Secure straps evenly and check fasteners | Fasten straps snugly across the hips, ensuring no pinch points exist for a comfortable fit. |
| 5. Monitor baby’s airway and comfort frequently | Ensure baby's chin is off their chest and watch for signals like overheating or discomfort. |
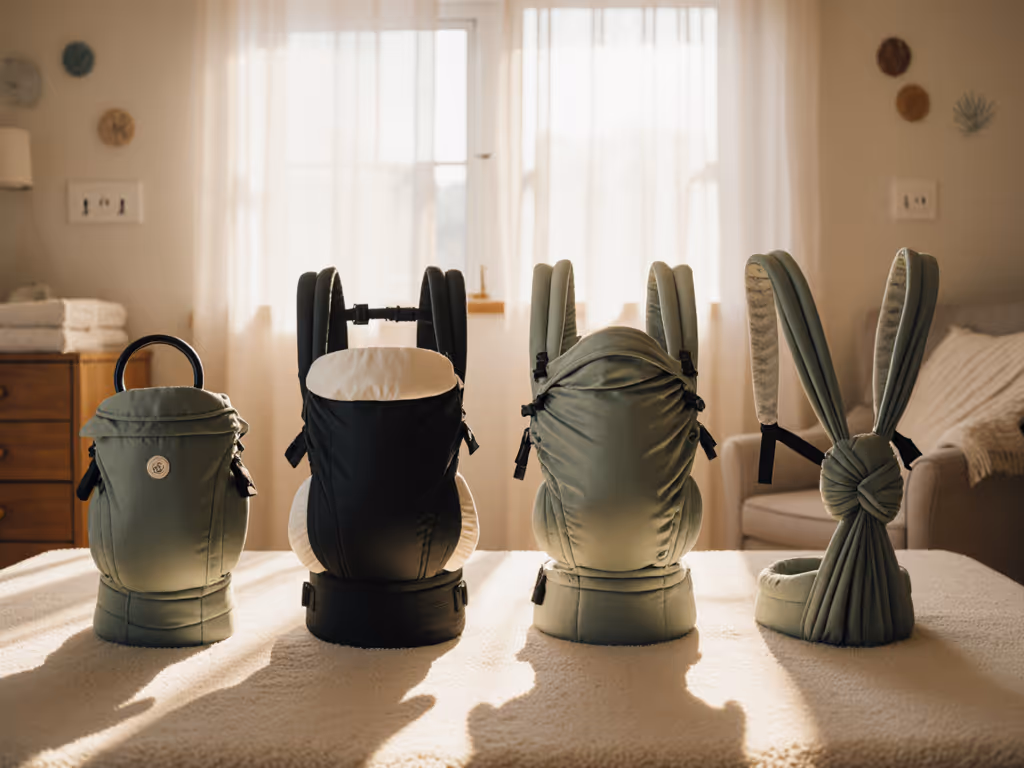
Step 1: Prepare and Inspect Your Baby Carrier
Before you start your babywearing journey, you need to thoroughly prepare and inspect your baby carrier. This critical step ensures your baby stays safe and secure during every carry.
First, spread your carrier out on a clean, flat surface with good lighting. Look carefully at every single component the straps, buckles, seams, and fabric. You want to catch any potential weakness before you place your little one inside. According to Australia's official product safety authority, caregivers must inspect materials, seams, and fasteners for any signs of wear before each use.
Check for these specific warning signs:
- Frayed or loose threads along seams
- Small rips or tears in fabric
- Stretched out or damaged straps
- Rust or corrosion on metal clasps
- Cracks or irregularities in plastic buckles
The Baby Safety Foundation recommends sitting down while initially loading your baby and double checking that all buckles, snaps, and clasps are completely secure. If you notice any damage during your inspection, do not use the carrier. Replace it immediately to protect your child.
Your next step will be understanding proper positioning techniques to keep your baby safe and comfortable.
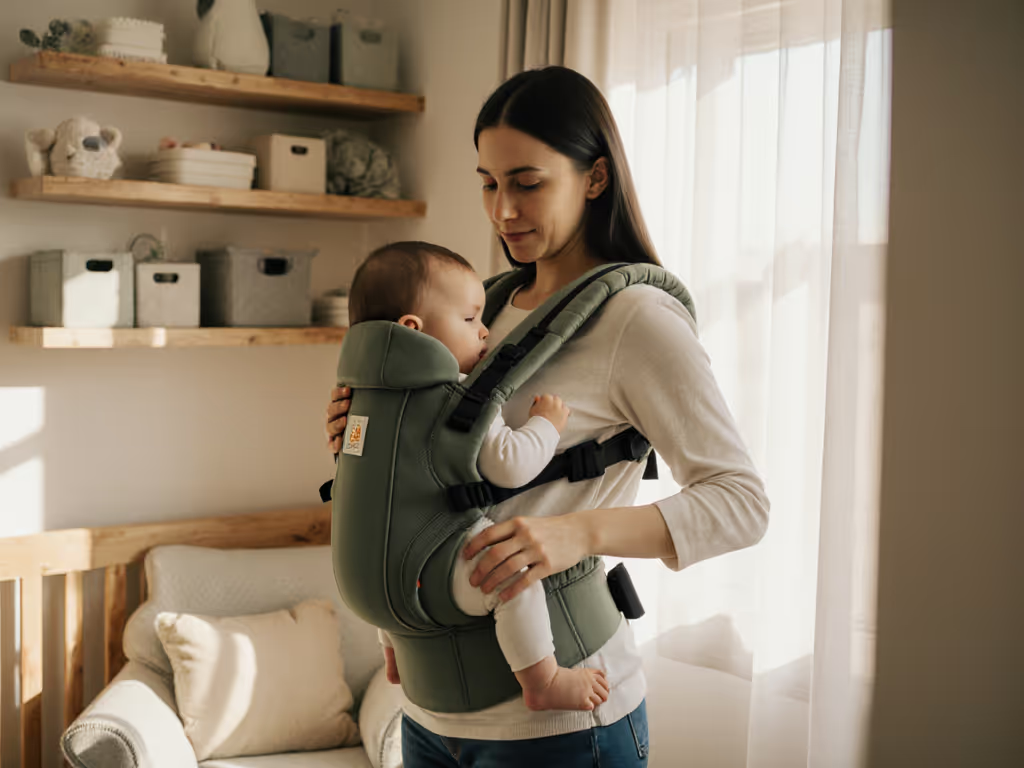
Step 2: Position Your Baby for Optimal Support
Now that your carrier is inspected and ready, it is time to position your baby for maximum comfort and safety. Proper positioning prevents potential strain on your baby's developing body and ensures a secure bonding experience.
Based on guidance from certified babywearing educators, the goal is creating an ergonomic "M" position that supports your baby's natural physiology. Your baby's legs should be spread wide with knees higher than their bottom and thighs fully supported from knee pit to knee pit. This position mimics how babies naturally sit when held and promotes healthy hip development.
The TICKS safety framework provides an excellent positioning checklist:
- Tight: Carrier should be snug with no loose fabric
- In view: Always be able to see your baby's face
- Close enough to kiss: Baby's head should be close to your chin
- Chin off chest: Ensure clear airway space
- Supported back: Maintain a gentle "J" curve spine alignment
A side view of your baby should reveal a natural "J" shaped posture with their spine slightly curved and head supported. Avoid positioning that causes the chin to press against the chest, which can restrict breathing. Your baby's weight should be evenly distributed across their bottom and thighs.

With your baby now perfectly positioned, you are ready to move confidently and securely.
Step 3: Adjust Carrier for Hip and Neck Alignment
Perfecting your baby carrier means carefully aligning your baby's delicate hip and neck structures. This critical step ensures comfort, supports healthy physical development, and prevents potential strain or discomfort.
Research indicates that optimal hip positioning is more than just placement it involves creating specific angles that support natural body mechanics. According to developmental experts, the ideal hip position requires a 40 to 55 degree abduction angle with 90 to 110 degrees of hip flexion. This means your baby's legs should be spread wide while their hips are slightly bent creating a natural "M" shape that mimics their seated position.
Focus on these key alignment points:
- Center baby's weight evenly across the carrier
- Ensure thighs are fully supported knee to knee
- Keep spine in a gentle curved "J" shape
- Support neck without forcing head into a fixed position
- Allow natural head movement while preventing slumping
As you adjust the carrier, watch your baby closely.
 Their head should rest comfortably with chin lifted slightly off their chest to maintain an open airway. The carrier should feel snug but not restrictive allowing your baby to settle into a natural seated position that supports their developing musculoskeletal system.
With careful alignment complete, you are now ready to move confidently and comfortably with your little one.
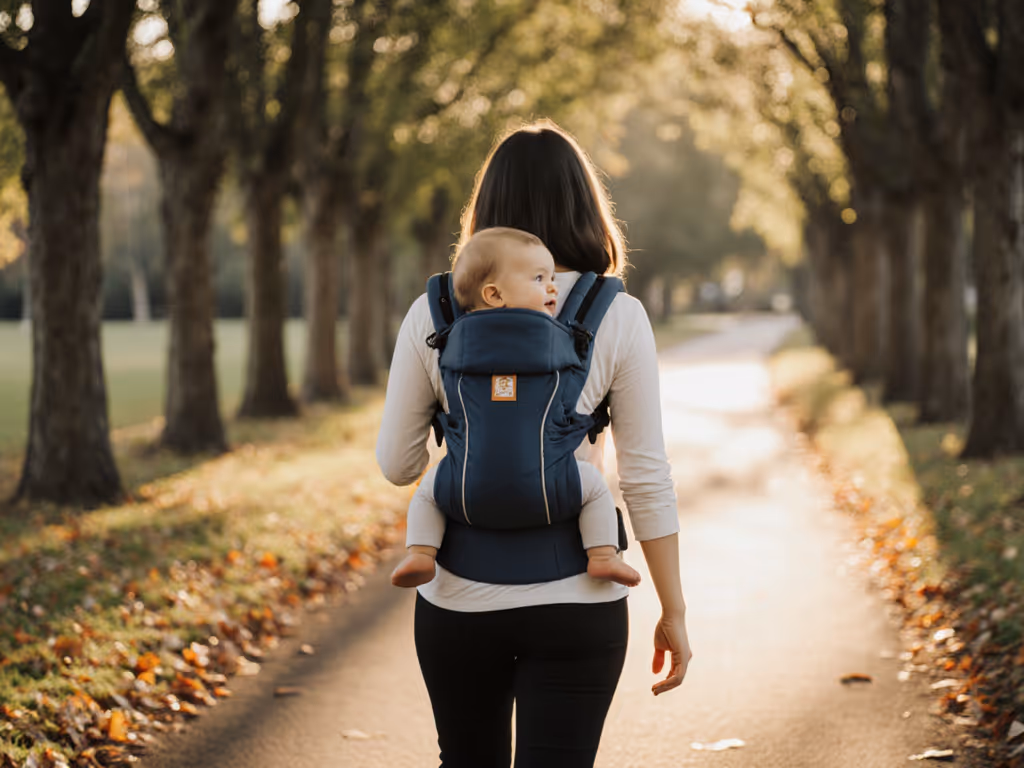
Step 4: Secure Straps and Fastenings Safely
Strapping your baby into a carrier requires more than just clicking a few buckles. This step is about creating a secure connection that protects your little one while keeping them comfortably close.
Start by understanding the importance of proper strap configuration. Professional safety guidance emphasizes selecting carriers that meet recognized standards like ASTM or EN 13209-2. These standards ensure the carrier has been rigorously tested for strap strength and overall safety design.
Here are the critical steps for secure fastening:
- Position the waist strap first across your hips
- Ensure waist strap is snug but not uncomfortably tight
- Connect shoulder straps evenly on both sides
- Pull each strap to distribute weight symmetrically
- Double check all buckles are fully engaged
- Verify no loose fabric or potential pinch points
Pay special attention to weight distribution. A well secured carrier will feel comfortable across your core muscles and prevent strain. The Australian Product Safety Authority recommends checking all fasteners for damage before each use looking for signs of wear like fraying, rust or weakened clasps.
A pro tip from experienced parents: practice securing the carrier without your baby first. This helps you understand the mechanics and build muscle memory for smooth quick attachment.
With straps securely fastened your next adventure awaits.
Step 5: Check Baby's Airway and Comfort
Ensuring your baby can breathe easily and comfortably is the most critical aspect of babywearing. This step is about creating a safe environment where your little one feels secure and can breathe without restriction.
The golden rule comes directly from safety experts using the TICKS framework keeping your baby in view at all times and ensuring their chin stays lifted off their chest. This prevents potential airway obstruction and allows you to monitor their breathing continuously.
Critical comfort and safety checks include:
- Ensure baby's face remains uncovered
- Check that chin is not pressed against chest
- Verify breathing sounds are steady and regular
- Feel for temperature to prevent overheating
- Look for signs of discomfort like squirming or fussing
- Make sure fabric is not blocking nostrils
Pay close attention to your baby's positioning.
![]() Their head should rest naturally with enough space to turn slightly and breathe freely. Overdressing can lead to overheating so dress your baby in light layers that allow good air circulation.
Their head should rest naturally with enough space to turn slightly and breathe freely. Overdressing can lead to overheating so dress your baby in light layers that allow good air circulation.
A quick parent pro tip: Periodically place your hand near your baby's face to feel their breath and check their comfort. Trust your instincts if something feels off.
With these safety checks complete you are ready to move confidently knowing your baby is secure and comfortable.
Here's a quick reference comparison of each babywearing step and its main safety focus:
| Step | Main Safety Focus | Key Actions |
|---|---|---|
| Prepare & Inspect Carrier | Carrier integrity | Check straps<br>Inspect buckles & fabric |
| Position for Support | Ergonomic fit & airway | Achieve "M" position<br>Use TICKS checklist |
| Adjust for Hip & Neck Alignment | Healthy development | Align hips & neck<br>Support spine |
| Secure Straps & Fastenings | Attachment & weight balance | Tighten straps<br>Double-check buckles |
| Check Baby's Airway & Comfort | Breathing & body temperature | Keep airway clear<br>Monitor comfort signs |
Elevate Your Babywearing Confidence with Expert Guidance
Mastering safe babywearing positions takes careful attention to detail and a deep understanding of your baby's unique needs. This article highlights the challenge many caregivers face in maintaining proper hip and neck alignment, secure strap fastening, and ensuring an open airway for baby comfort and safety. You want your little one to feel snug, supported, and secure without compromising their developing body or your own comfort.
At Caregiver Carry, we share your commitment to safe, ergonomic babywearing that fosters happy, healthy bonding moments. Our platform offers detailed safety checklists and expert reviews of carriers that meet the highest standards for comfort, support, and security. Whether you are learning to position your baby correctly or looking for a carrier that fits your lifestyle and body type, our comprehensive guides will help you carry with confidence.
Start mastering babywearing safety today by exploring our in-depth instructions and discover the perfect carrier solutions designed to support both you and your baby. Visit Caregiver Carry now to take the next step toward a joyful and secure babywearing experience.
Frequently Asked Questions
How can I ensure my baby is positioned safely in a carrier?
Properly position your baby by creating an ergonomic "M" shape with their legs, ensuring knees are higher than their bottom. Always use the TICKS checklist to verify that the carrier is snug, your baby is visible, and their airway is clear.
What should I check on my baby carrier before use?
Inspect your baby carrier for frayed straps, damaged buckles, and any signs of wear on the fabric. Look at all components closely to ensure everything is in good condition so you can ensure your baby's safety during carrying.
How do I know if the straps of my baby carrier are secure enough?
Secure straps should feel snug and distribute your baby's weight evenly across your core. Verify that all buckles are fully engaged and make adjustments as needed to prevent any loose fabric that could lead to discomfort.
What are the signs that my baby is uncomfortable in the carrier?
Look for signs of discomfort such as squirming, fussing, or changes in breathing. If your baby seems uncomfortable, check their position, ensure their airway is clear, and make necessary adjustments to the carrier.
How can I maintain my baby's comfortable temperature while babywearing?
Dress your baby in light layers to help regulate their temperature and prevent overheating. Check your baby for signs of warmth or sweating, and adjust their clothing or the carrier's coverage accordingly to keep them comfortable.
What is the ideal position for my baby’s neck and hips in the carrier?
Aim for a gentle
Related Articles